
Fabric Shrinkage
Key Terms To Know When Sourcing Fabric
February 13, 2013Fabric shrinkage can make or break the quality perception of a sewn product.
If you’re producing apparel or other sewn products in bulk, chances are good that those products will eventually need to be washed by the consumer, which may also result in unfortunate shrinkage that forever impacts the fit. There’s also not much worse than spending lots of time, energy, and money getting your patterns and samples to fit like you want, only to have the garment shrink in the wash and not fit as well anymore.
In most cases, fabrics are cut straight off the roll and sewn into finished products without any pre-washing or shrinking unless the textile mill has done additional finishing steps. The bulk fabric on the roll typically undergoes processing that makes it easier to work with during cutting and sewing; this hand feel often changes after washing. While conventional home sewing advice says to pre-wash your fabric on a one-off project, production yardage is the opposite. Even if you’re making very small quantities to start, It doesn’t really make much sense to to cut 20 yards off an 80 yard roll of fabric and toss it in the washing machine, then wrestle with rerolling it smoothly (although I have indeed done this on some personal projects!).
If you are purchasing hundreds or thousands of yards straight from the mill, you may be able to request that the fabric be preshrunk as part of the final processing. This can add a few dollars to the per yard cost that may be worth considering, depending on how much the fabric shrinks. If you’re buying fabric in smaller quantities by the roll or by the yard however, there isn’t much you can do beyond wash testing and planning to factor in shrinkage accordingly.
Often, cheaper fabrics shrink more than higher quality fabrics, but the results are all over the place. There are many factors at play: fiber content and type of weave or knit can affect a fabric having minimal shrinkage or a concerning 10% shrinkage. Cheap knits tend to be some of the worst offenders, but even a high quality knit may shrink 3% after a wash and dry cycle. Other things can affect shrinkage, such as dying or printing; some colors will shrink more than others in the same fabric.
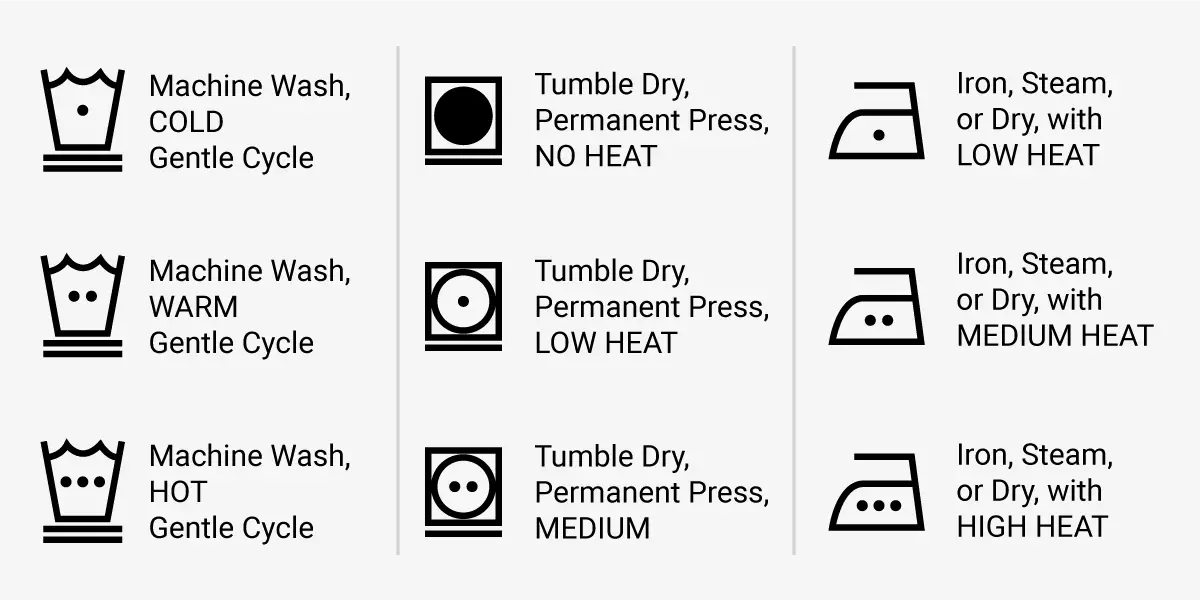
In order to accurately determine how much your fabric shrinks, you will need to do multiple wash tests using a combination of temperature settings that are recommended by the textile manufacturer and/or what you will be listing on the finished product’s care & content label. Often fabrics shrink the most during the first wash & dry cycle, but sometimes they shrink even more over subsequent cycles.
Depending on whether you are testing a stable knit or a woven that has a tendency for edges to fray in the wash, there are a couple of shrink testing methods I recommend.
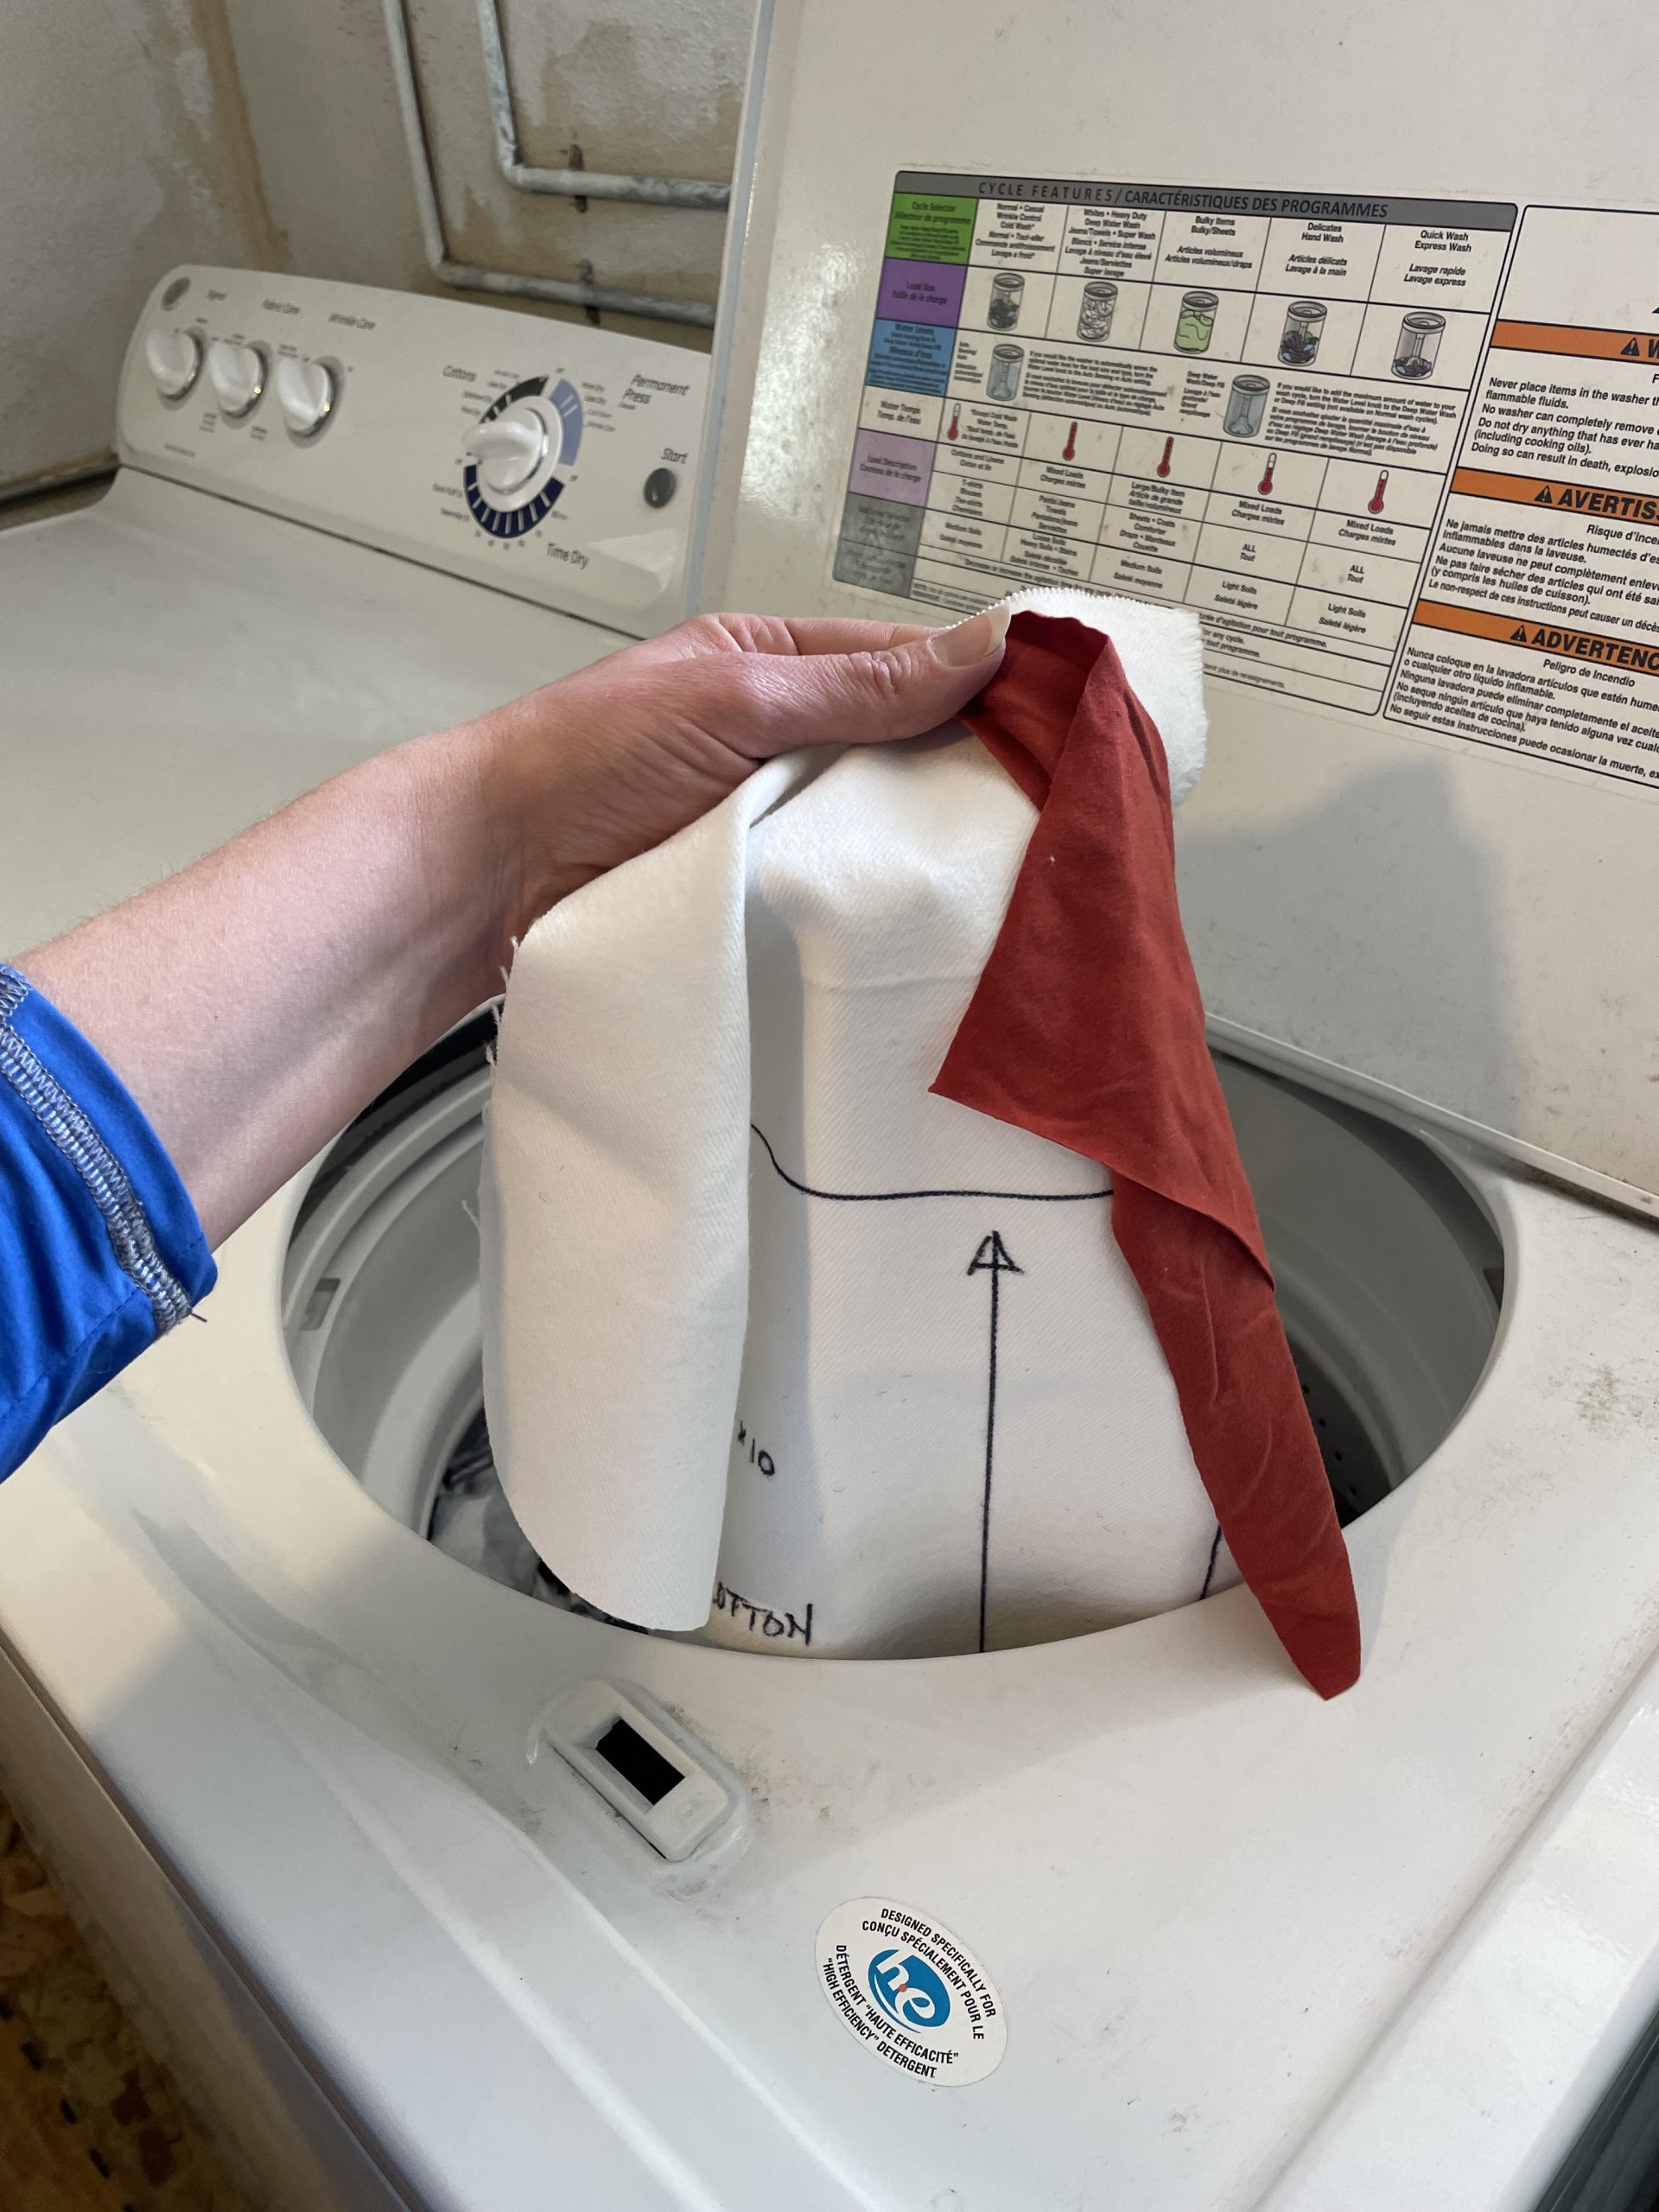
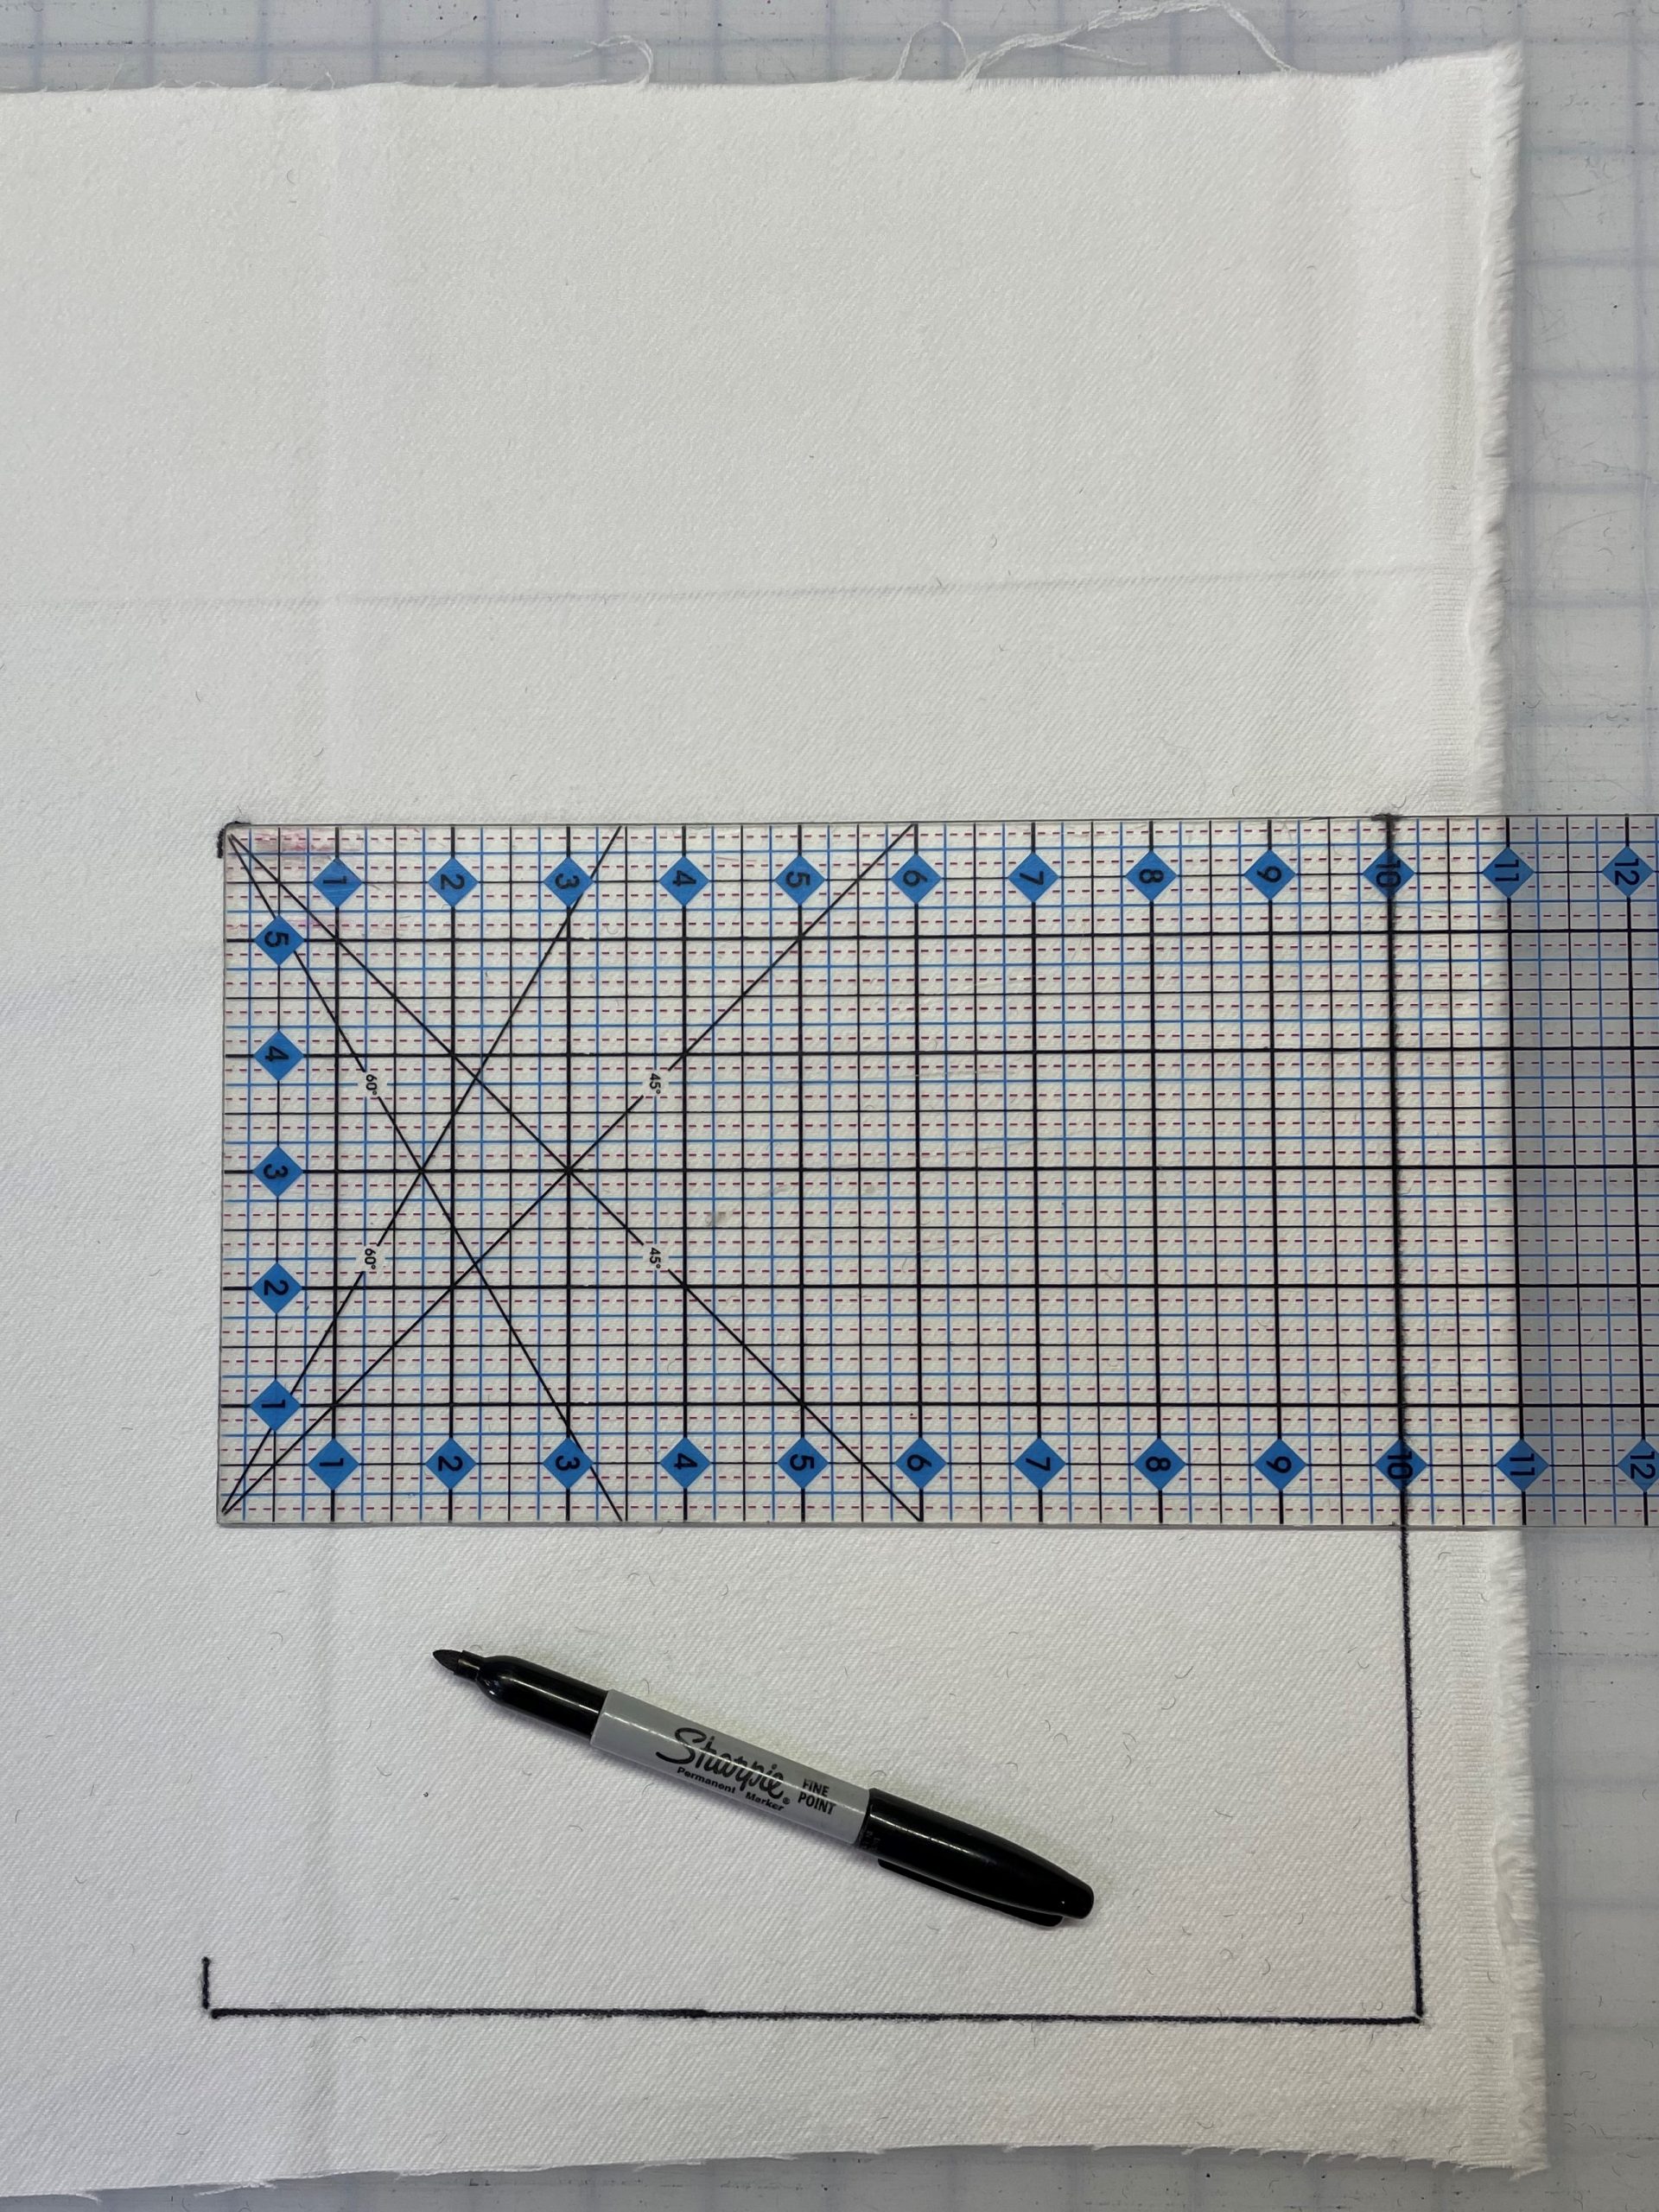
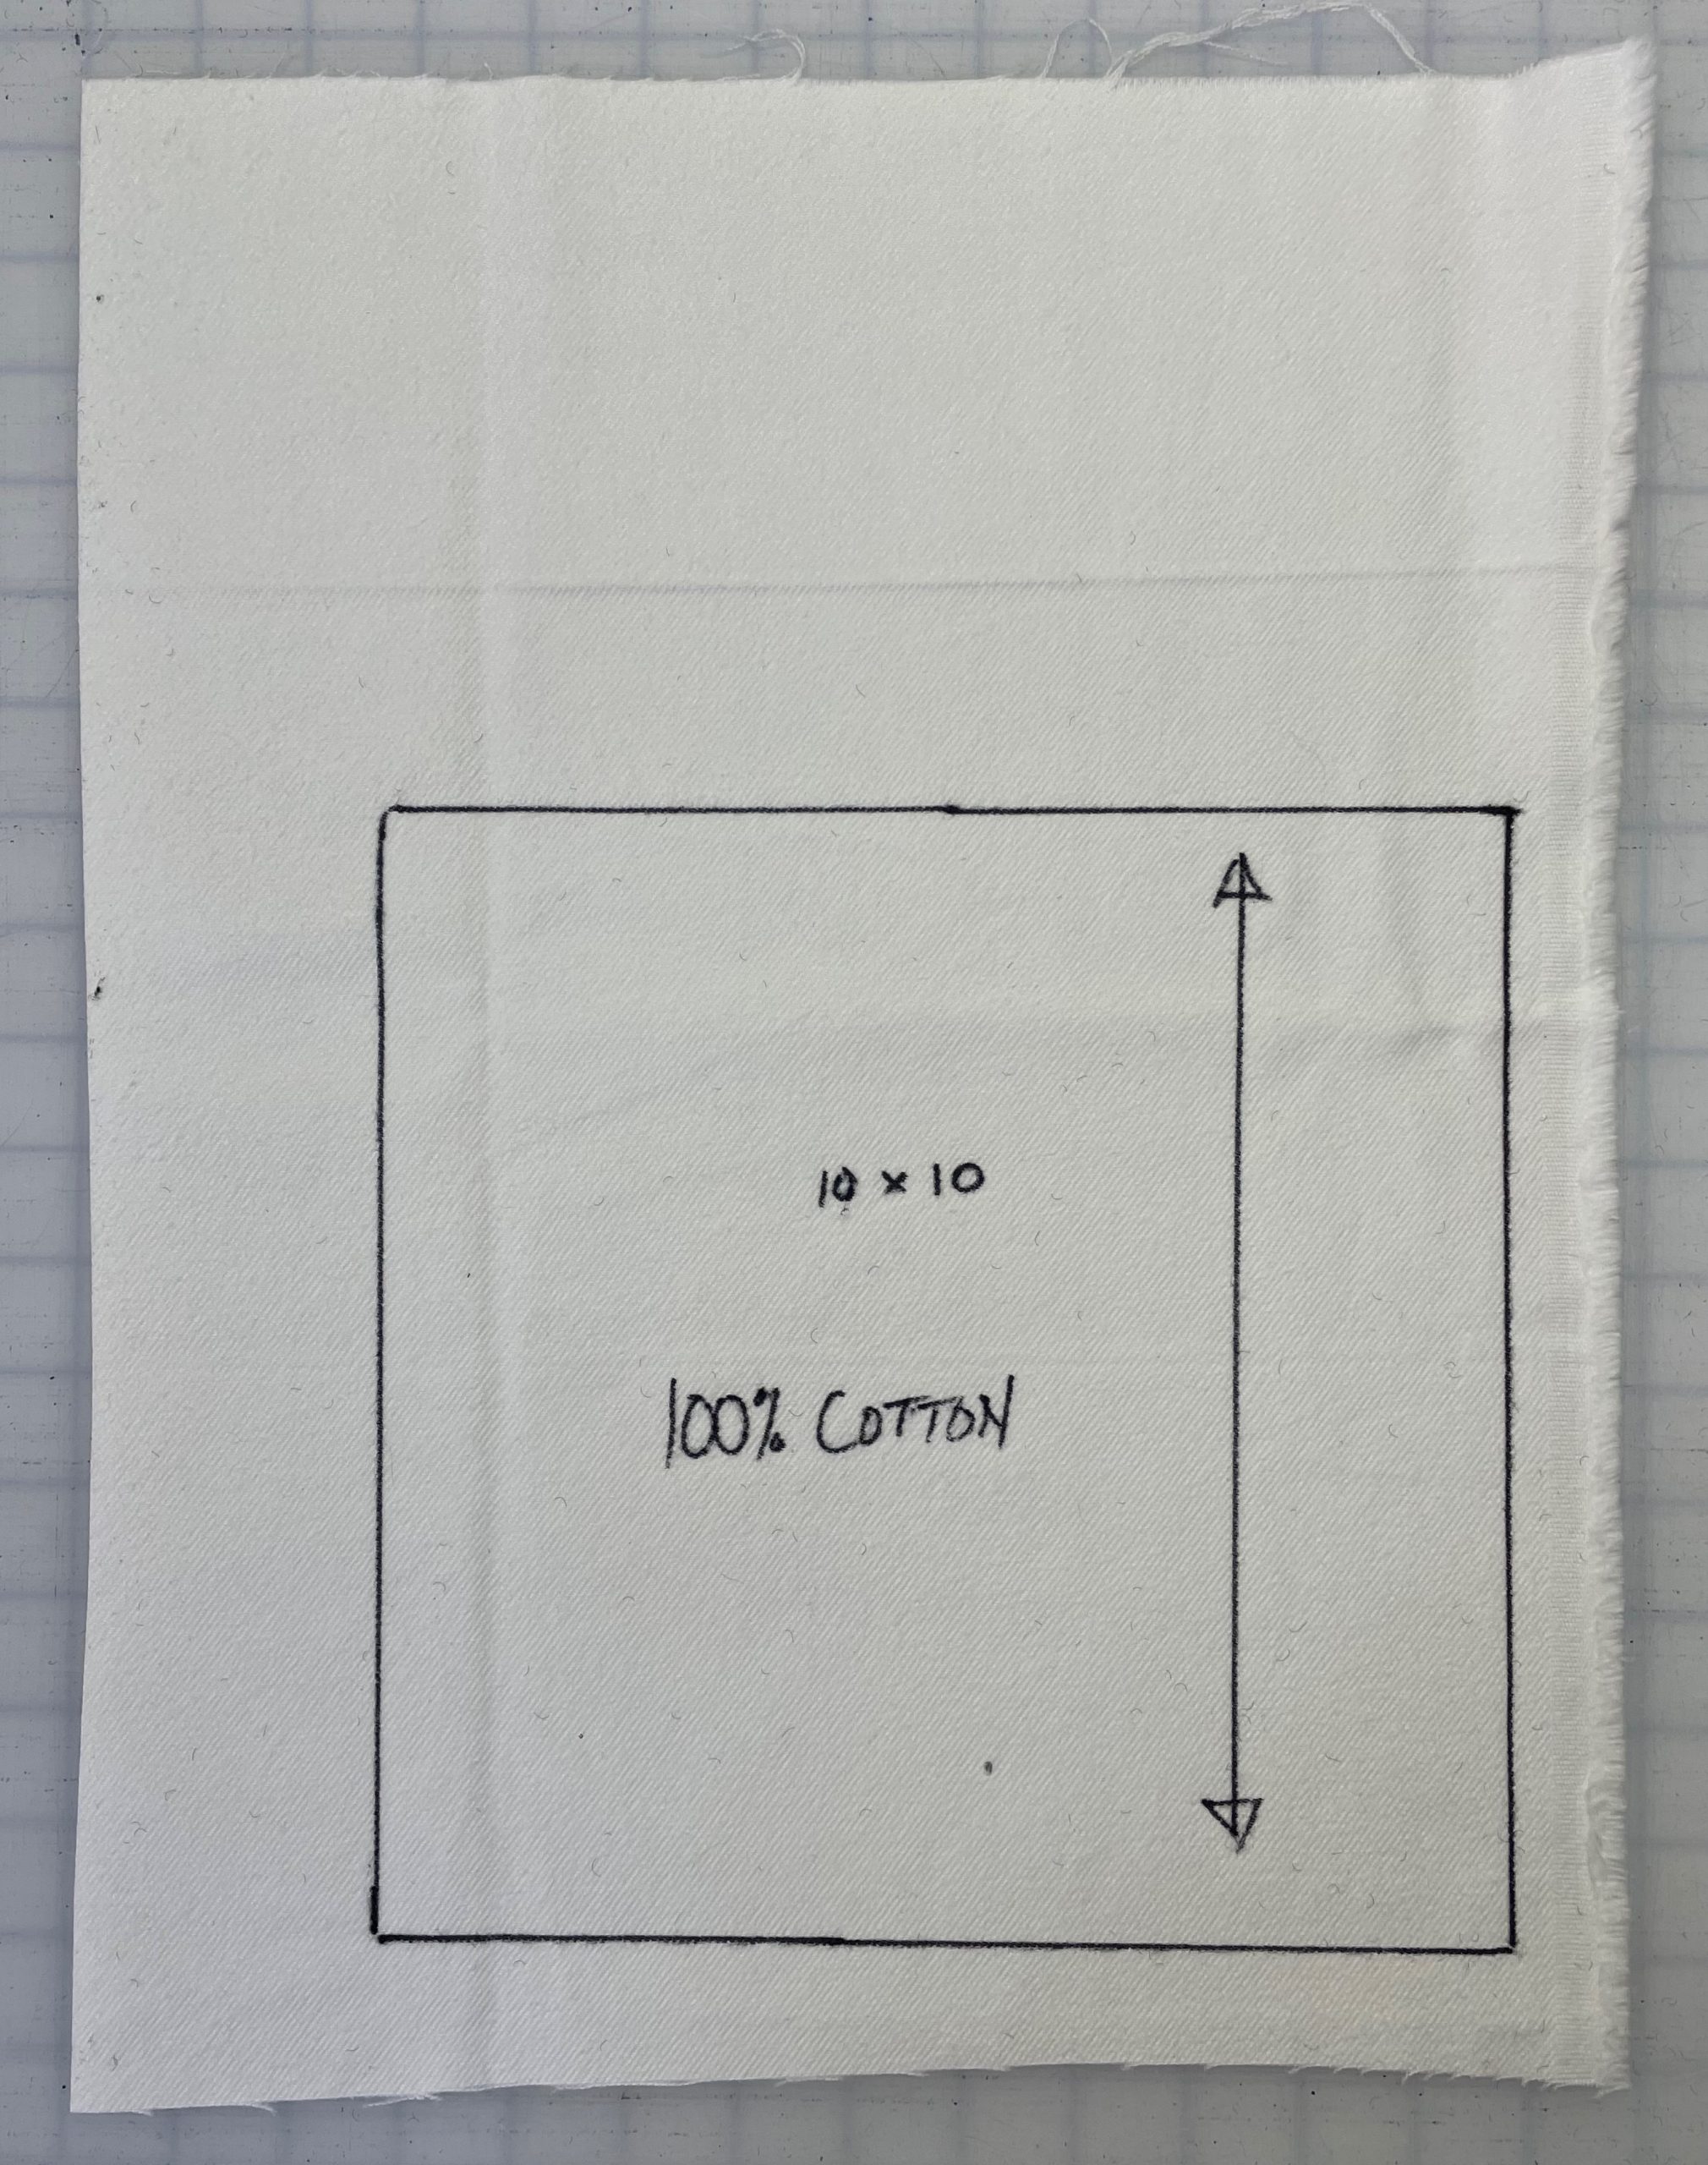
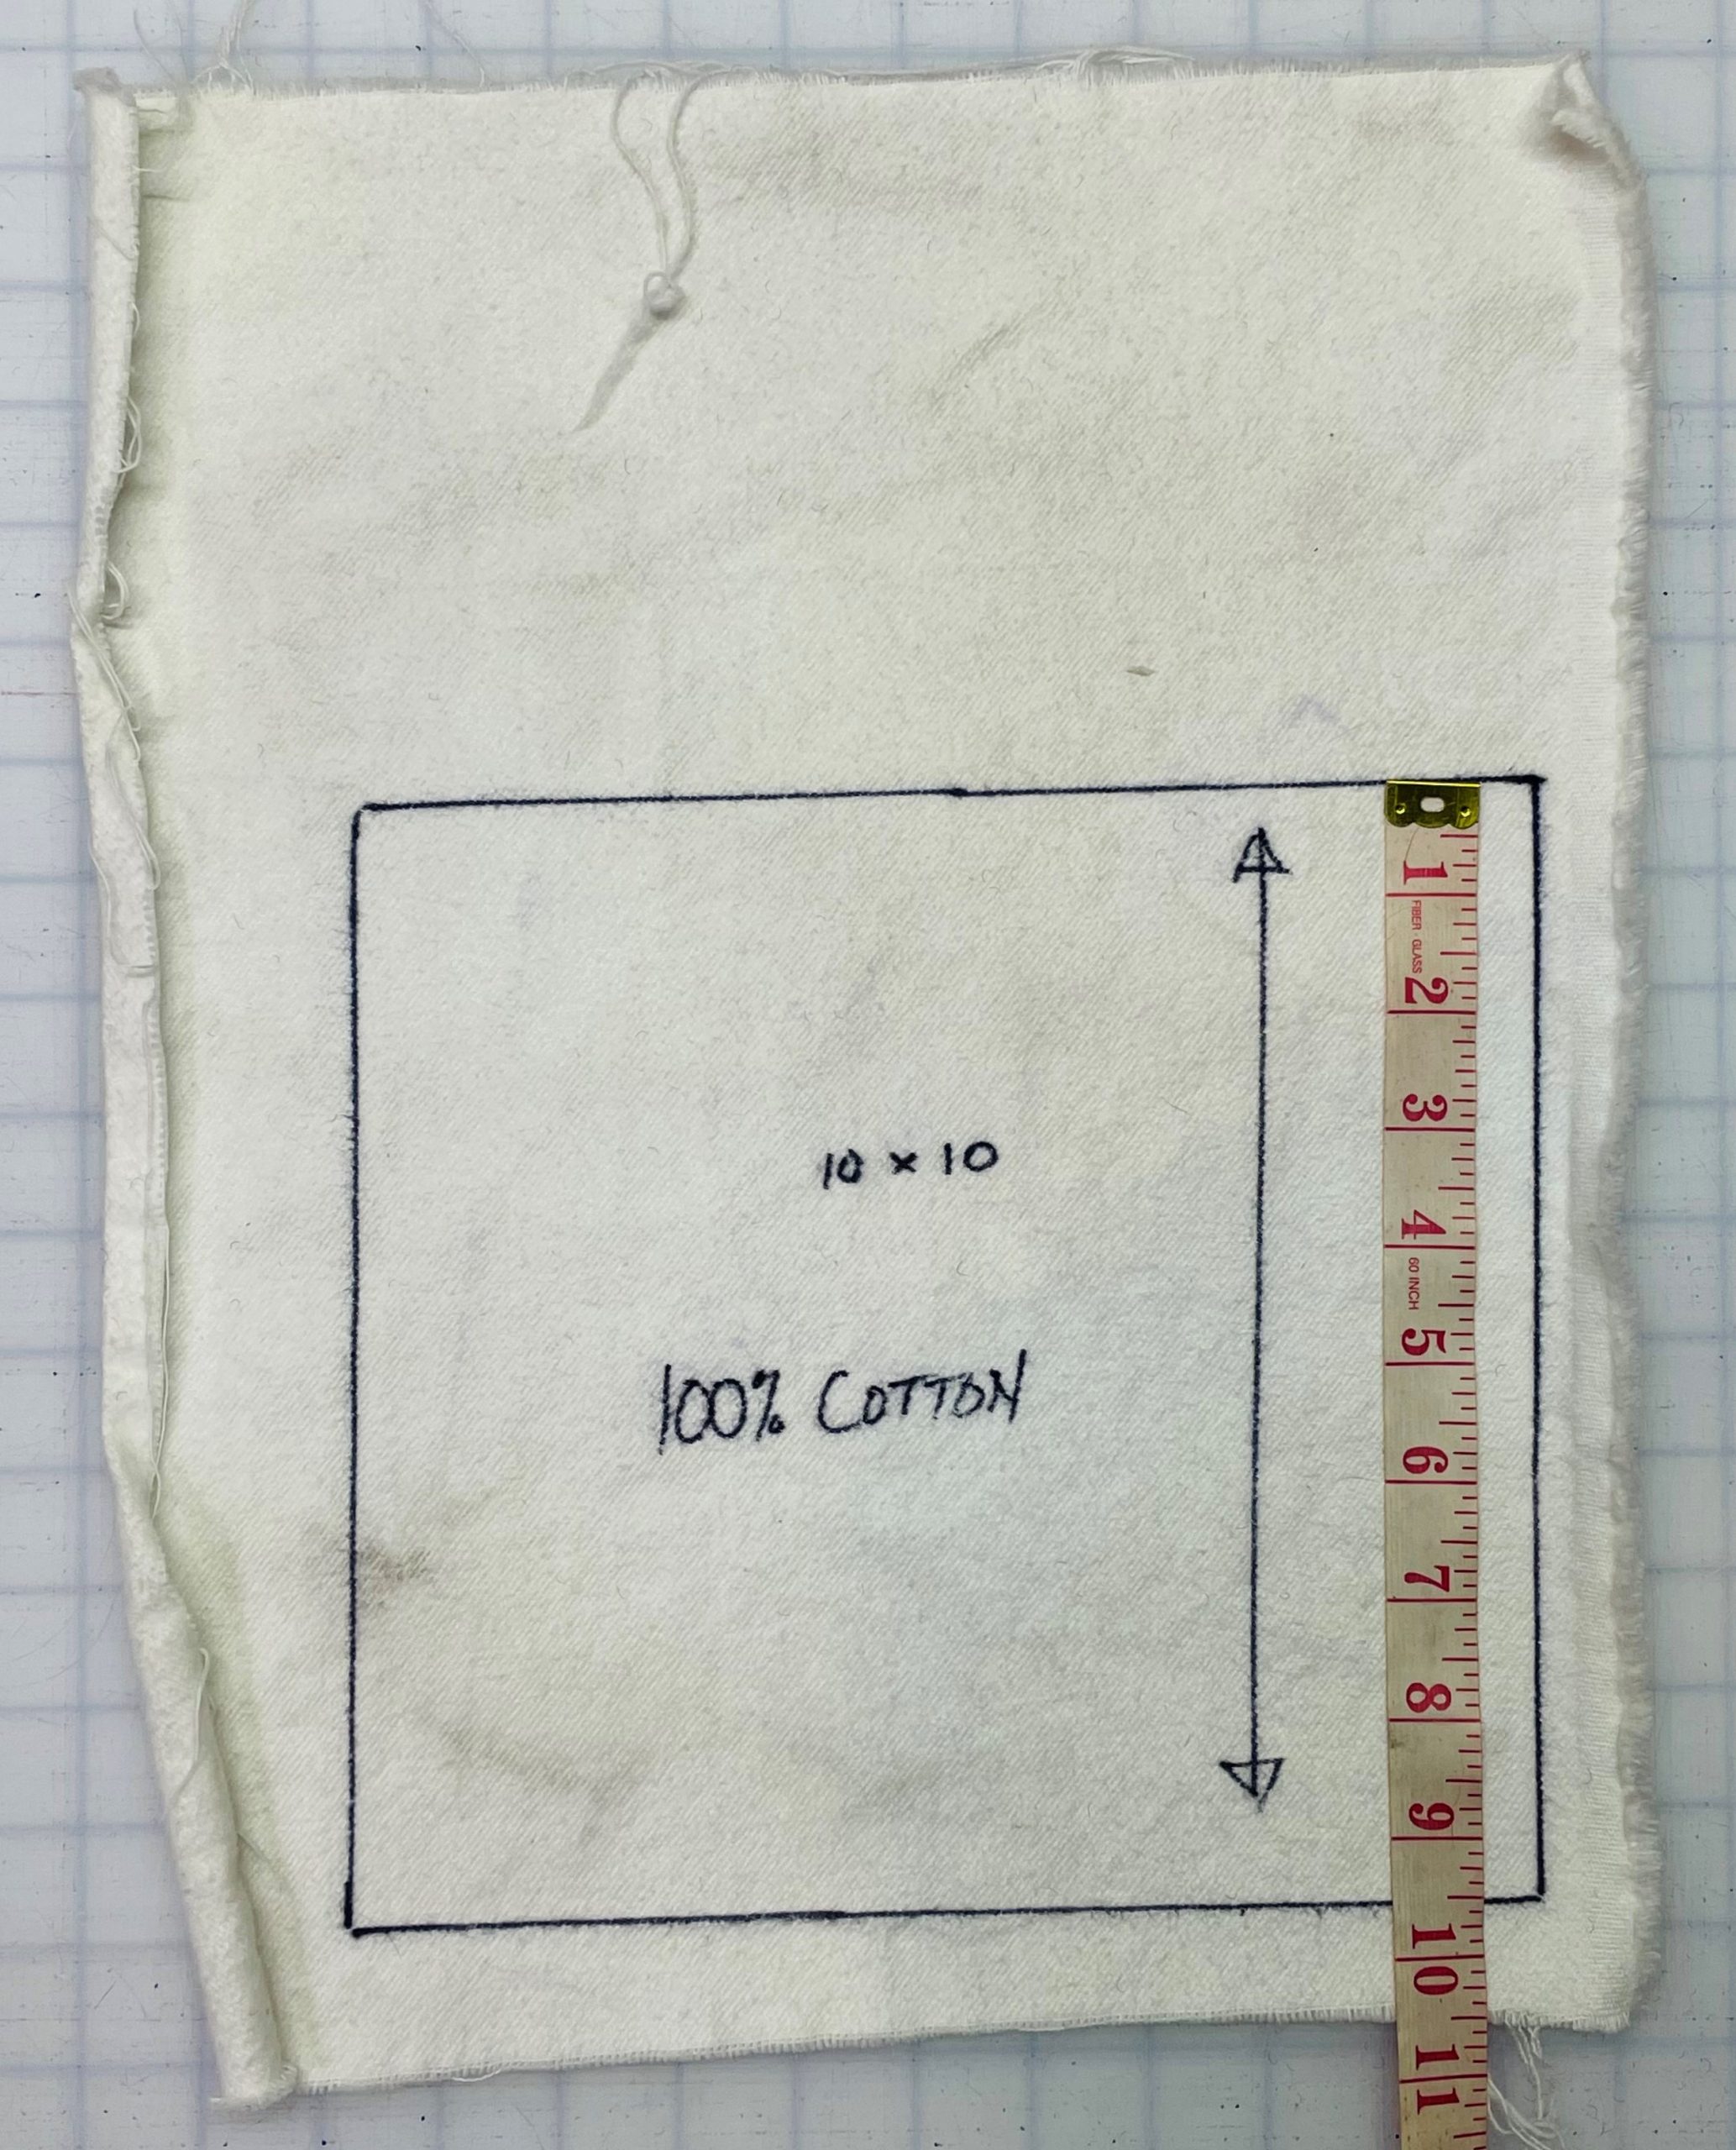
In the case of wovens, use a sharpie to draw a box on a slightly larger cut of fabric. For easy math calculations, make it 10″ x 10″. Do not include the selvedge inside this box, as the edges of the fabric may shrink differently. Ensure the grain line is marked, particularly if the selvedge edge will not be intact in the cut swatch, as you will need to be able to accurately orient the swatch to know how much it shrinks on the grain vs. on the cross-grain. If you have a serger/overlock machine or pinking shears, you can cut down on the mess in the dryer by finishing the edges a bit beyond the 10″ x 10″ box; just make sure to leave enough fabric to ensure any frayed edges don’t unravel into the box and void the measurements.
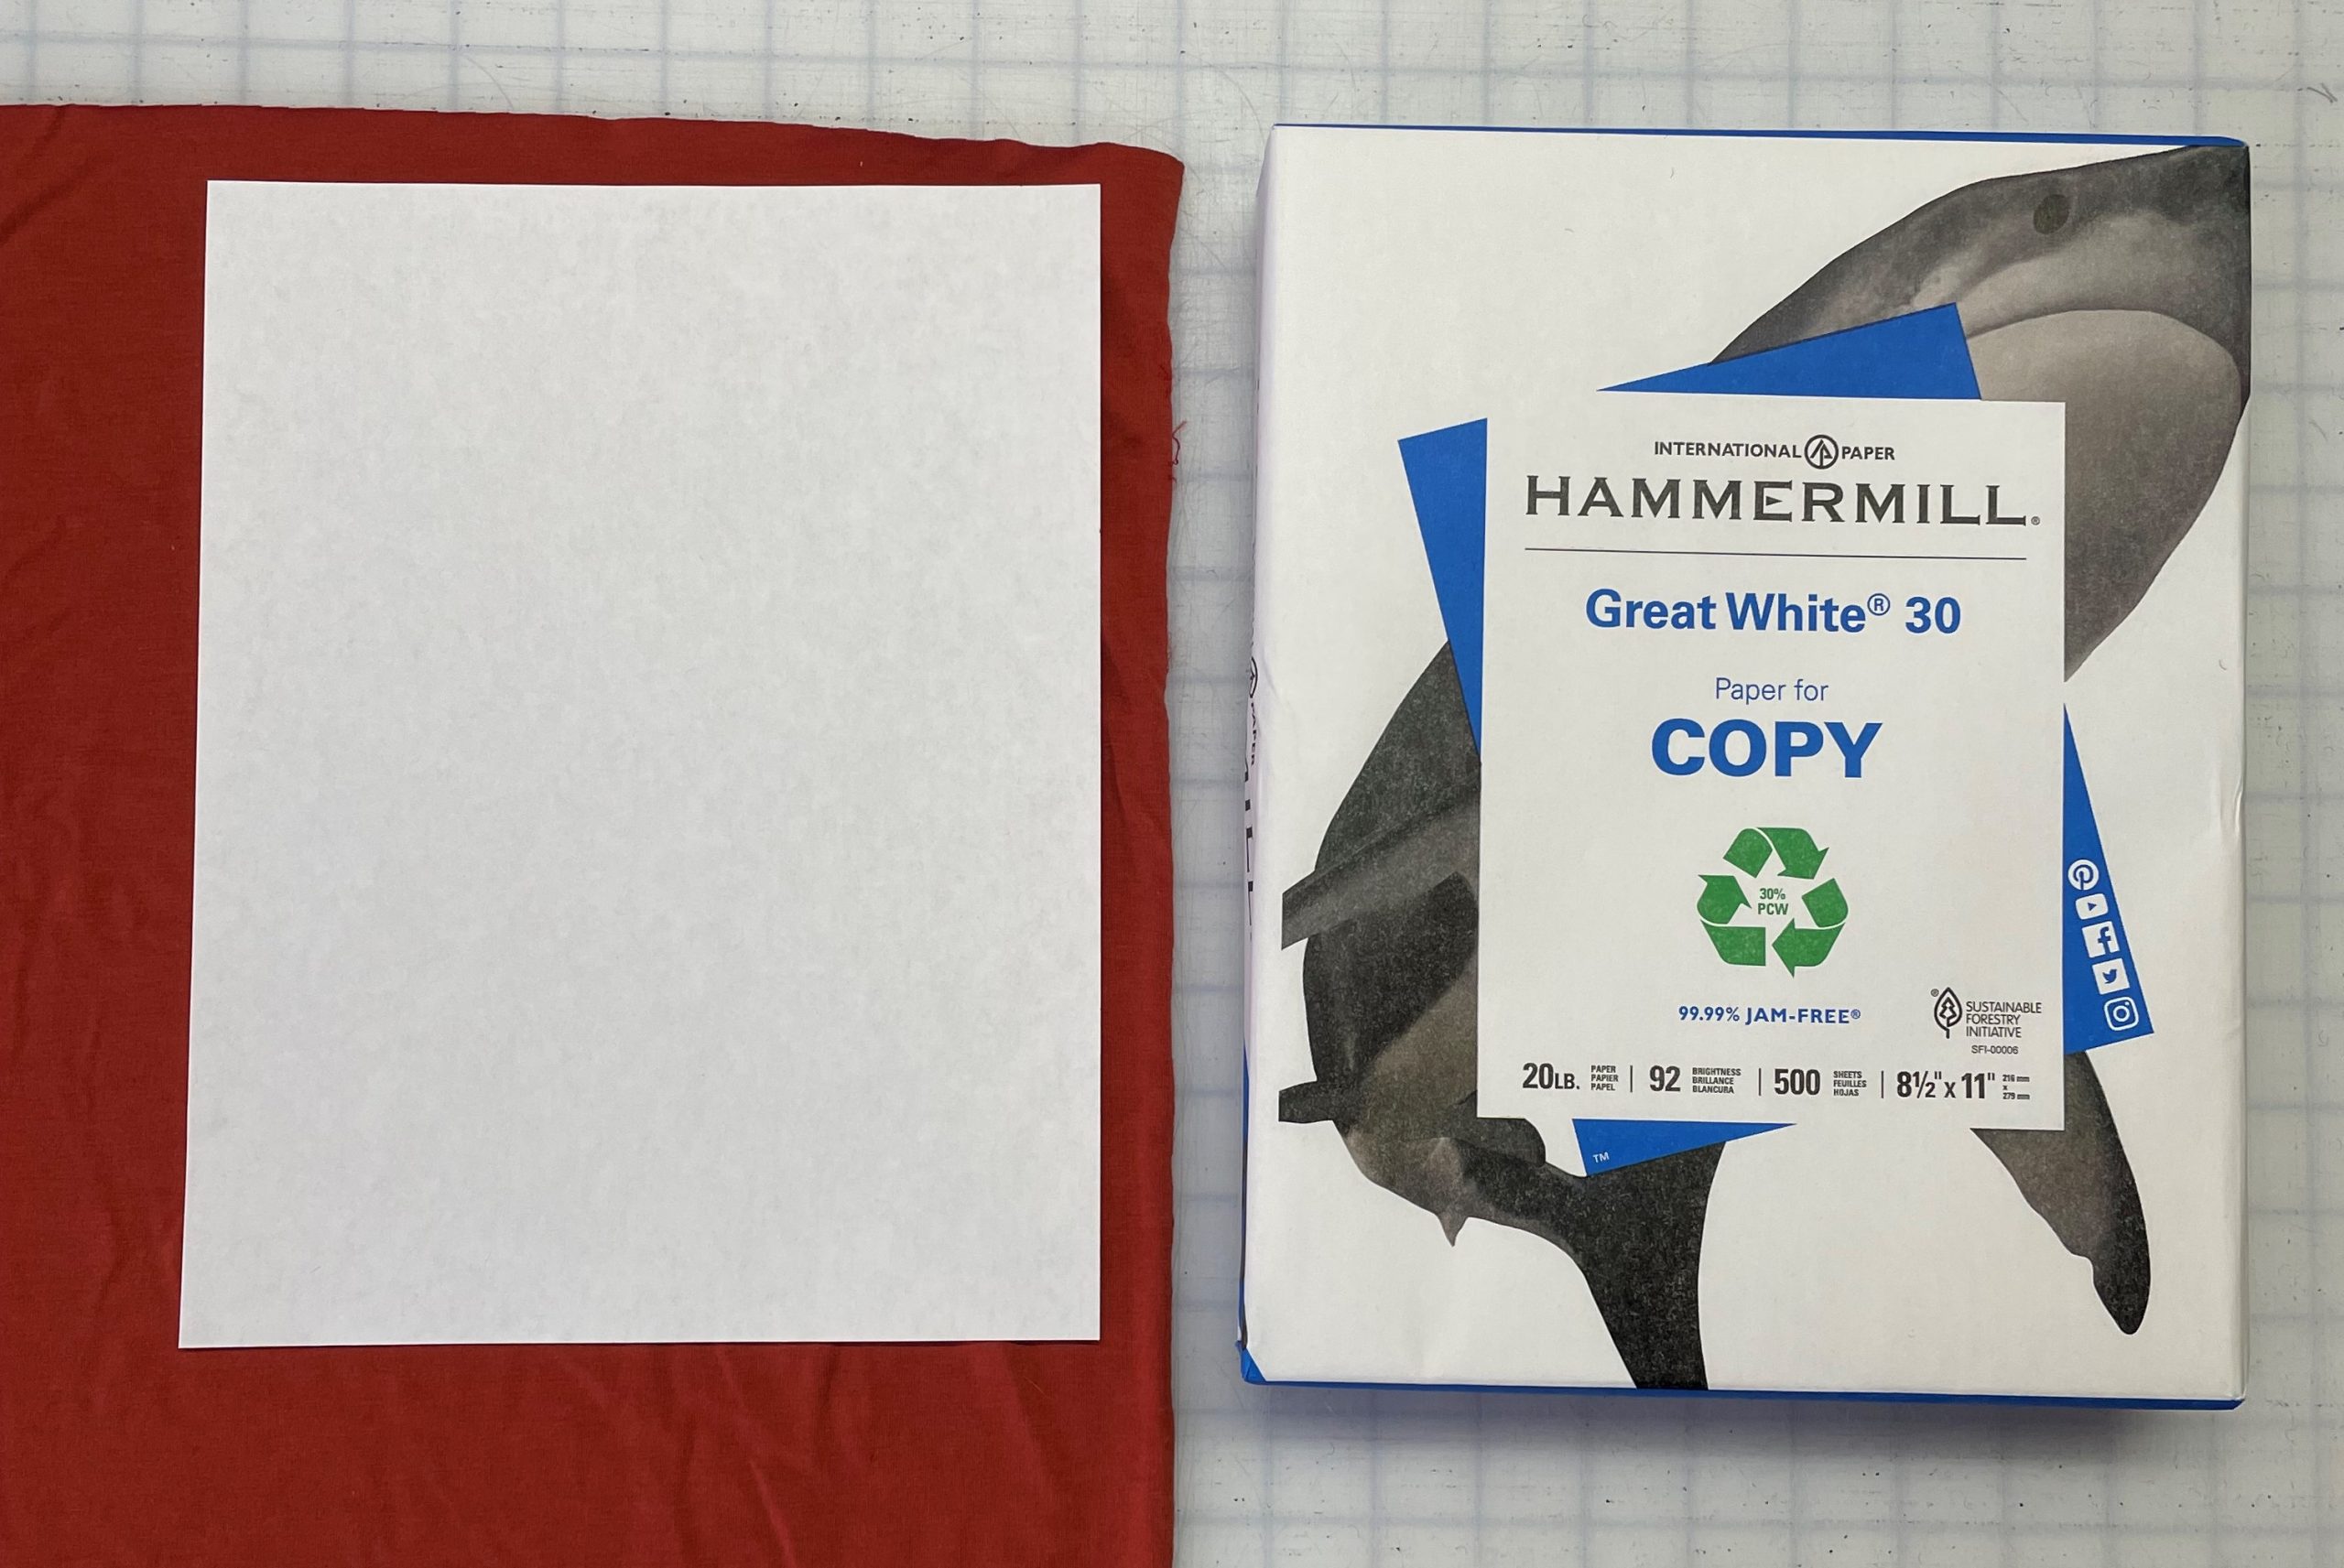
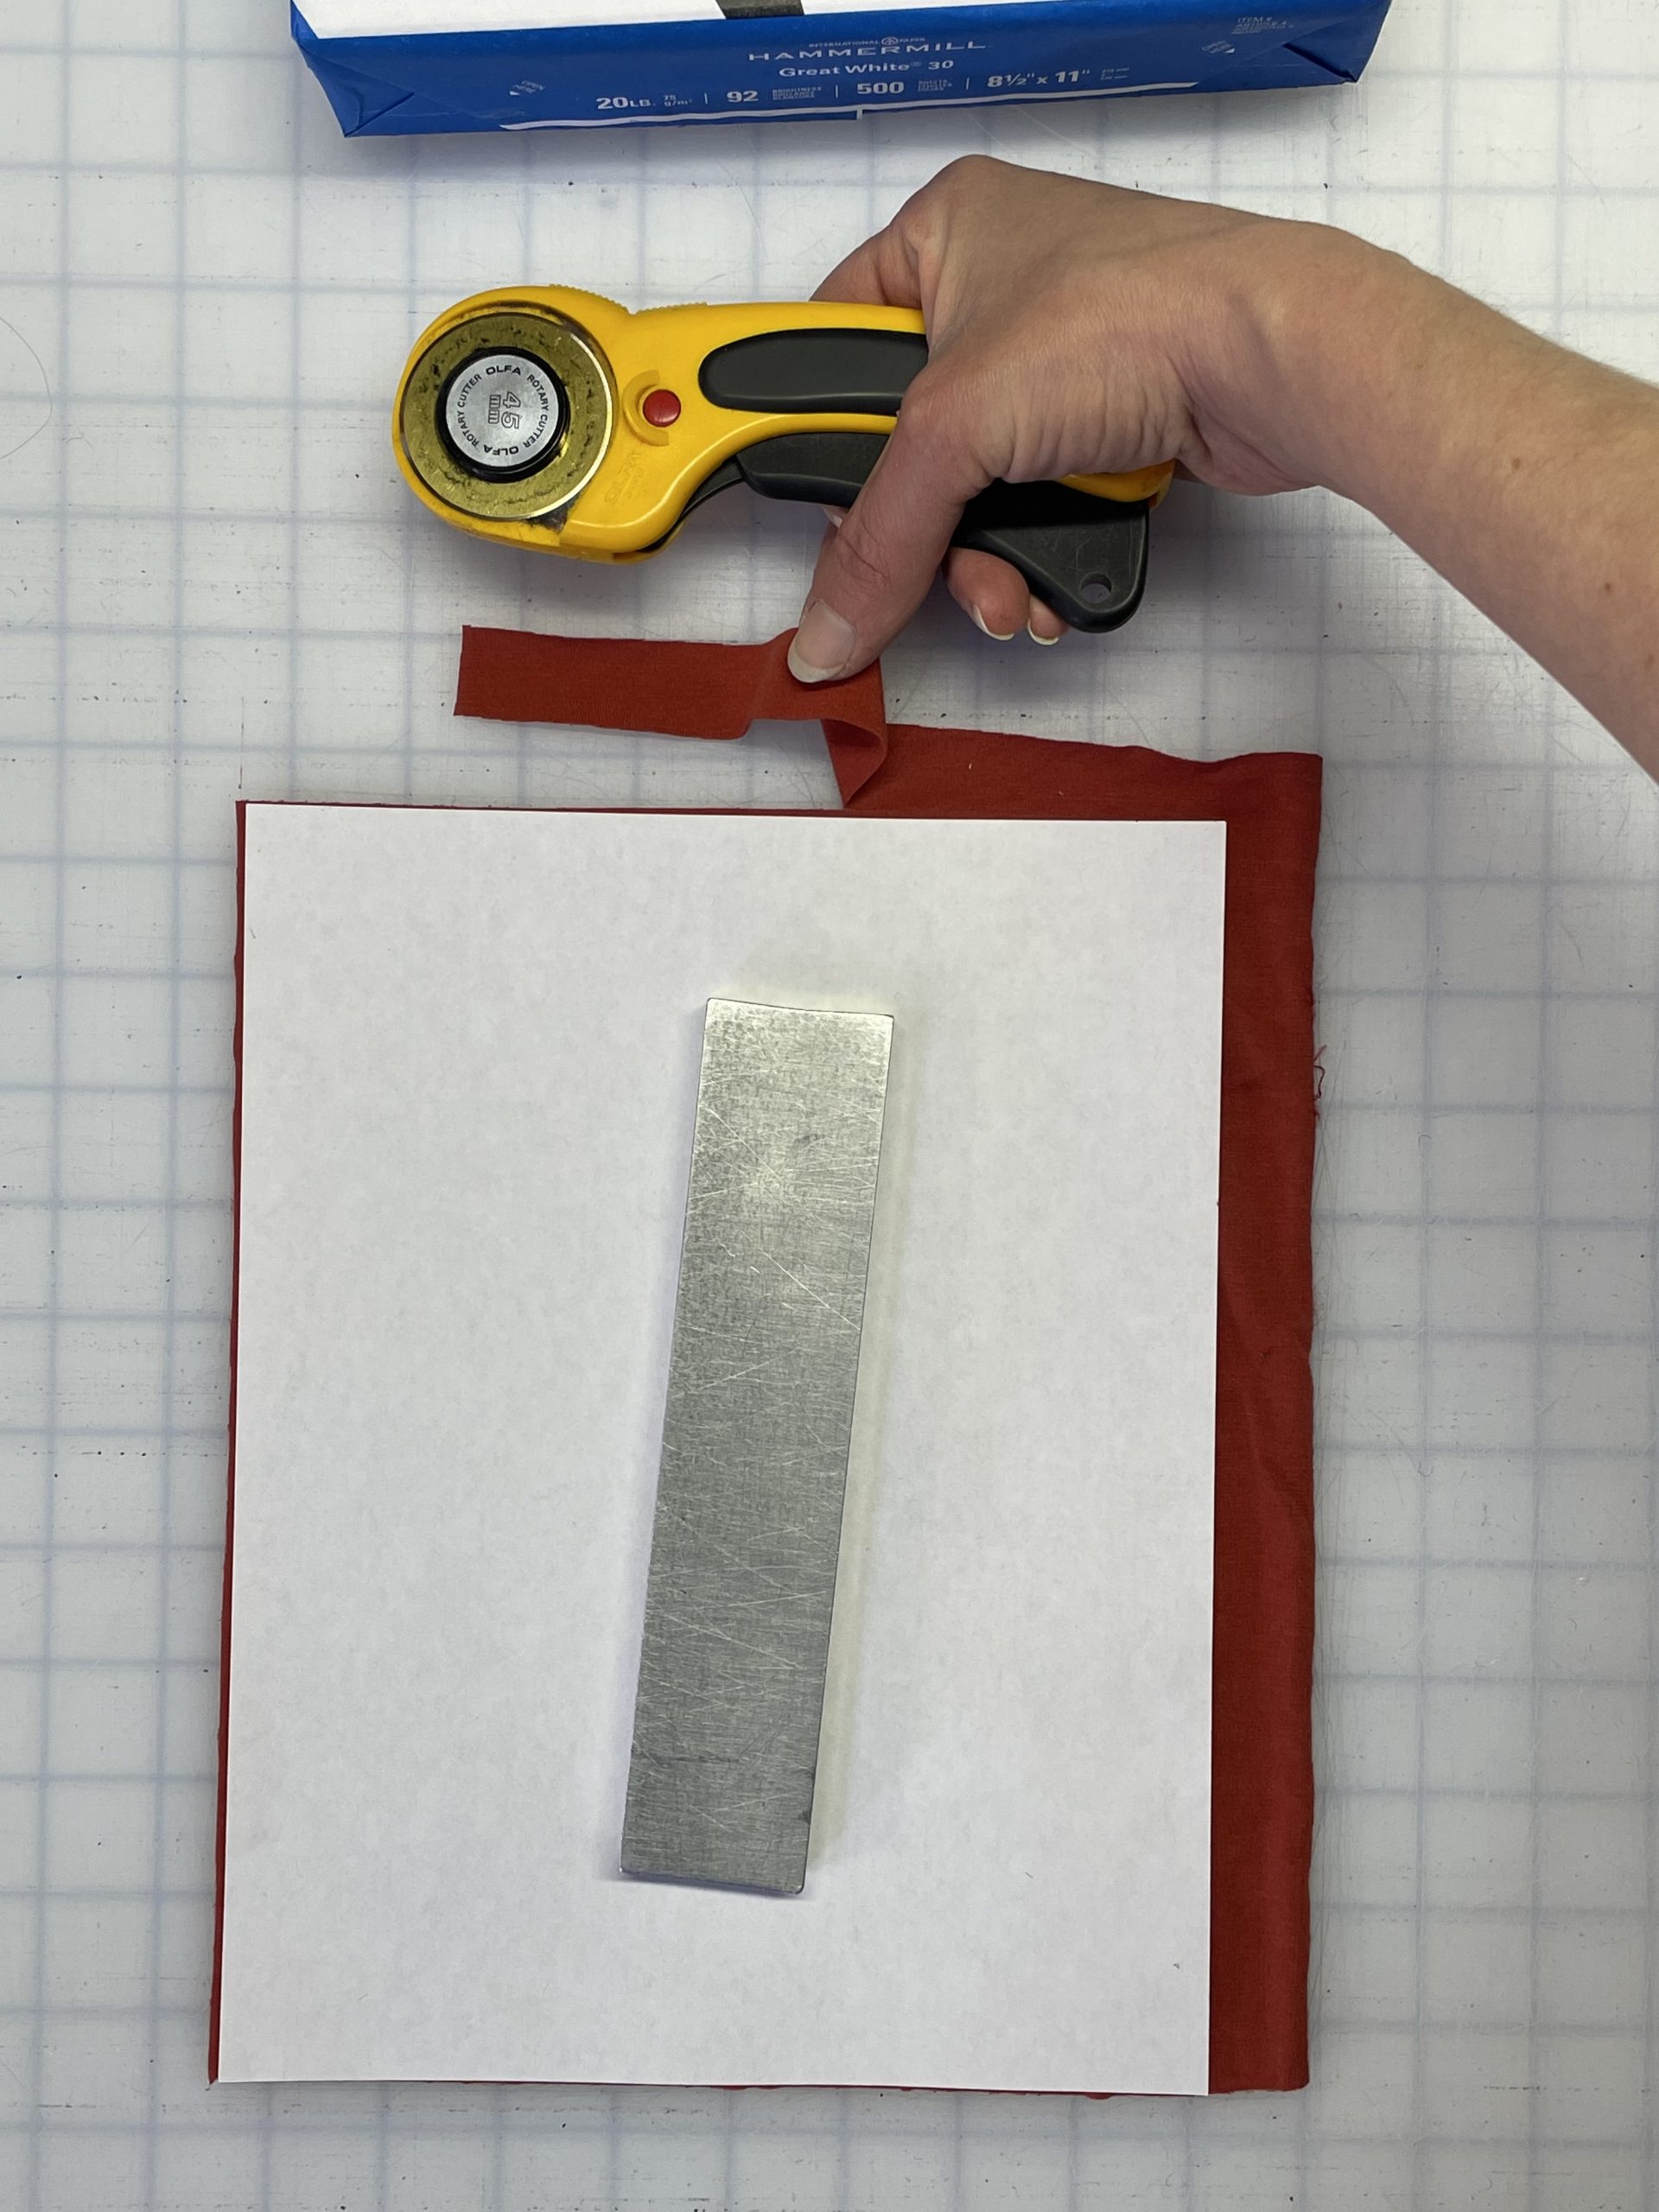
For knits and other fabrics that don’t fray, I like to use a standard sheet of 8.5″ x 11″ letter printer paper as a cut template. I place the long edge along the grain, since the length of knits typically shrinks more than the width. As you can usually see the grain direction in the knit structure, it is not necessary to mark the grainline. A safety pin can alternatively be used to mark the grain direction and/or face side of the swatches.
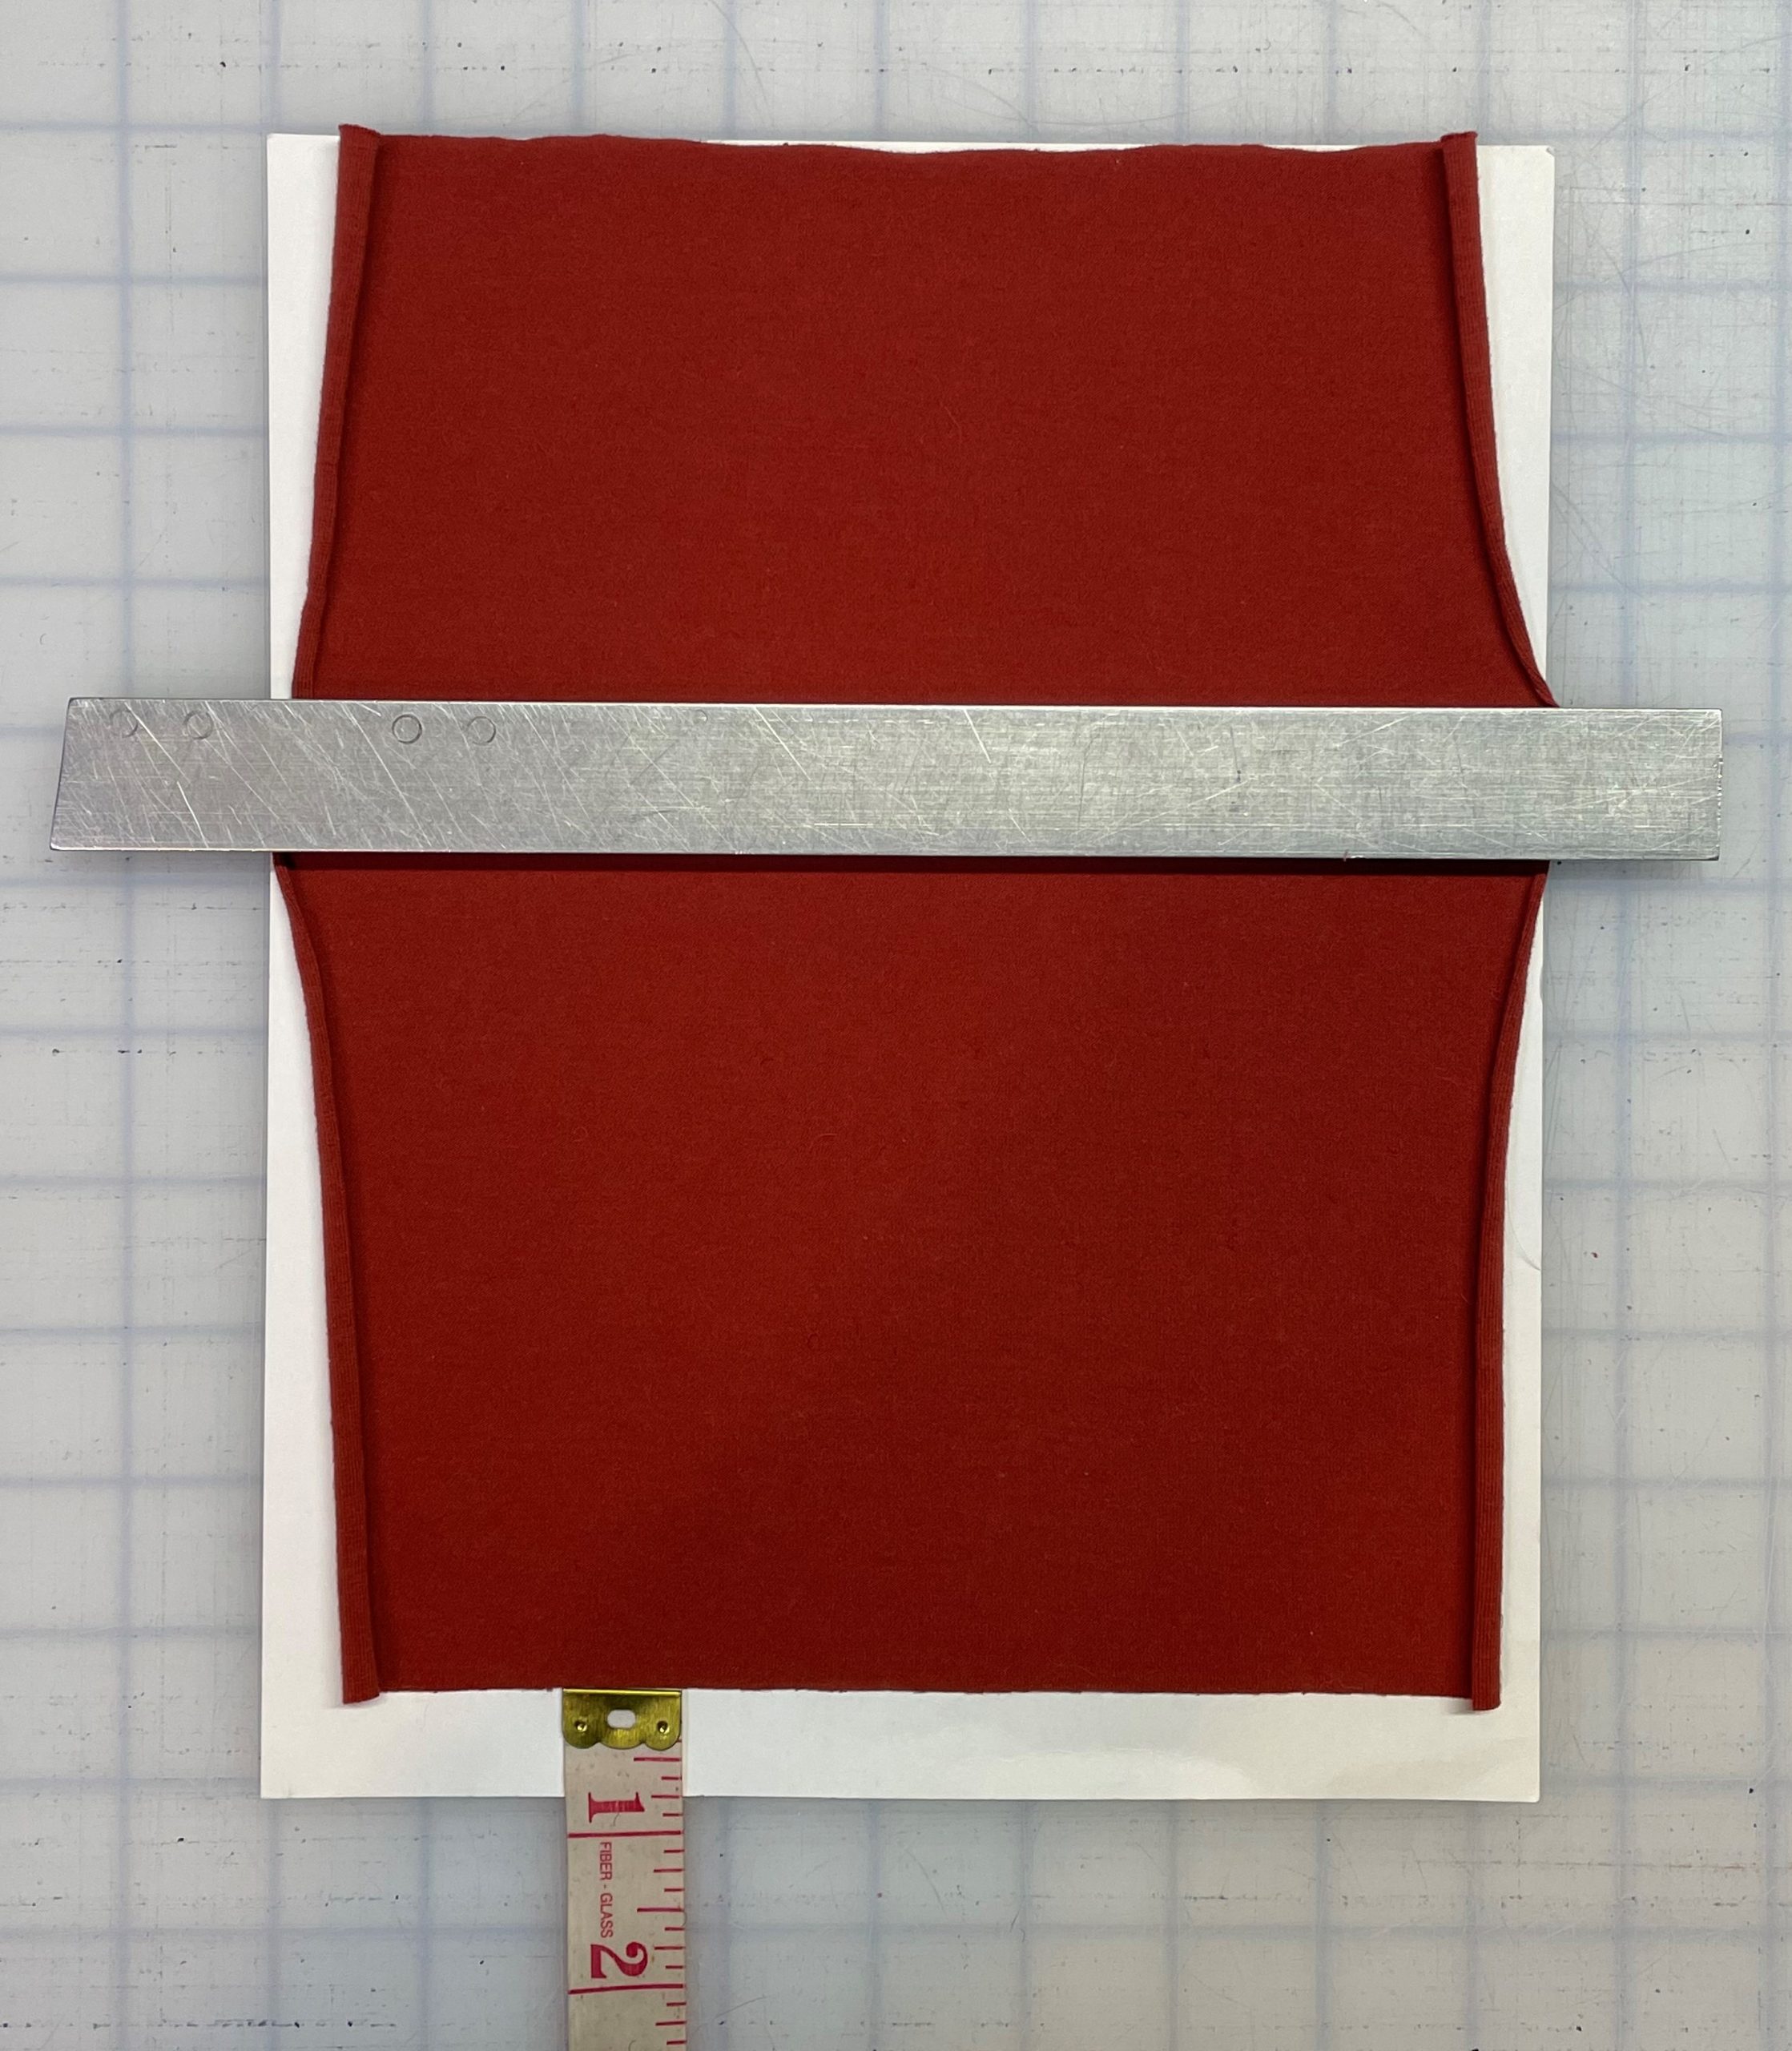
After washing and drying the samples, measure and note how much the fabrics shrink in length and width.
Fabric Shrinkage = (Original Size – Final Size) / Original Size, then multiply by 100 to get the percentage
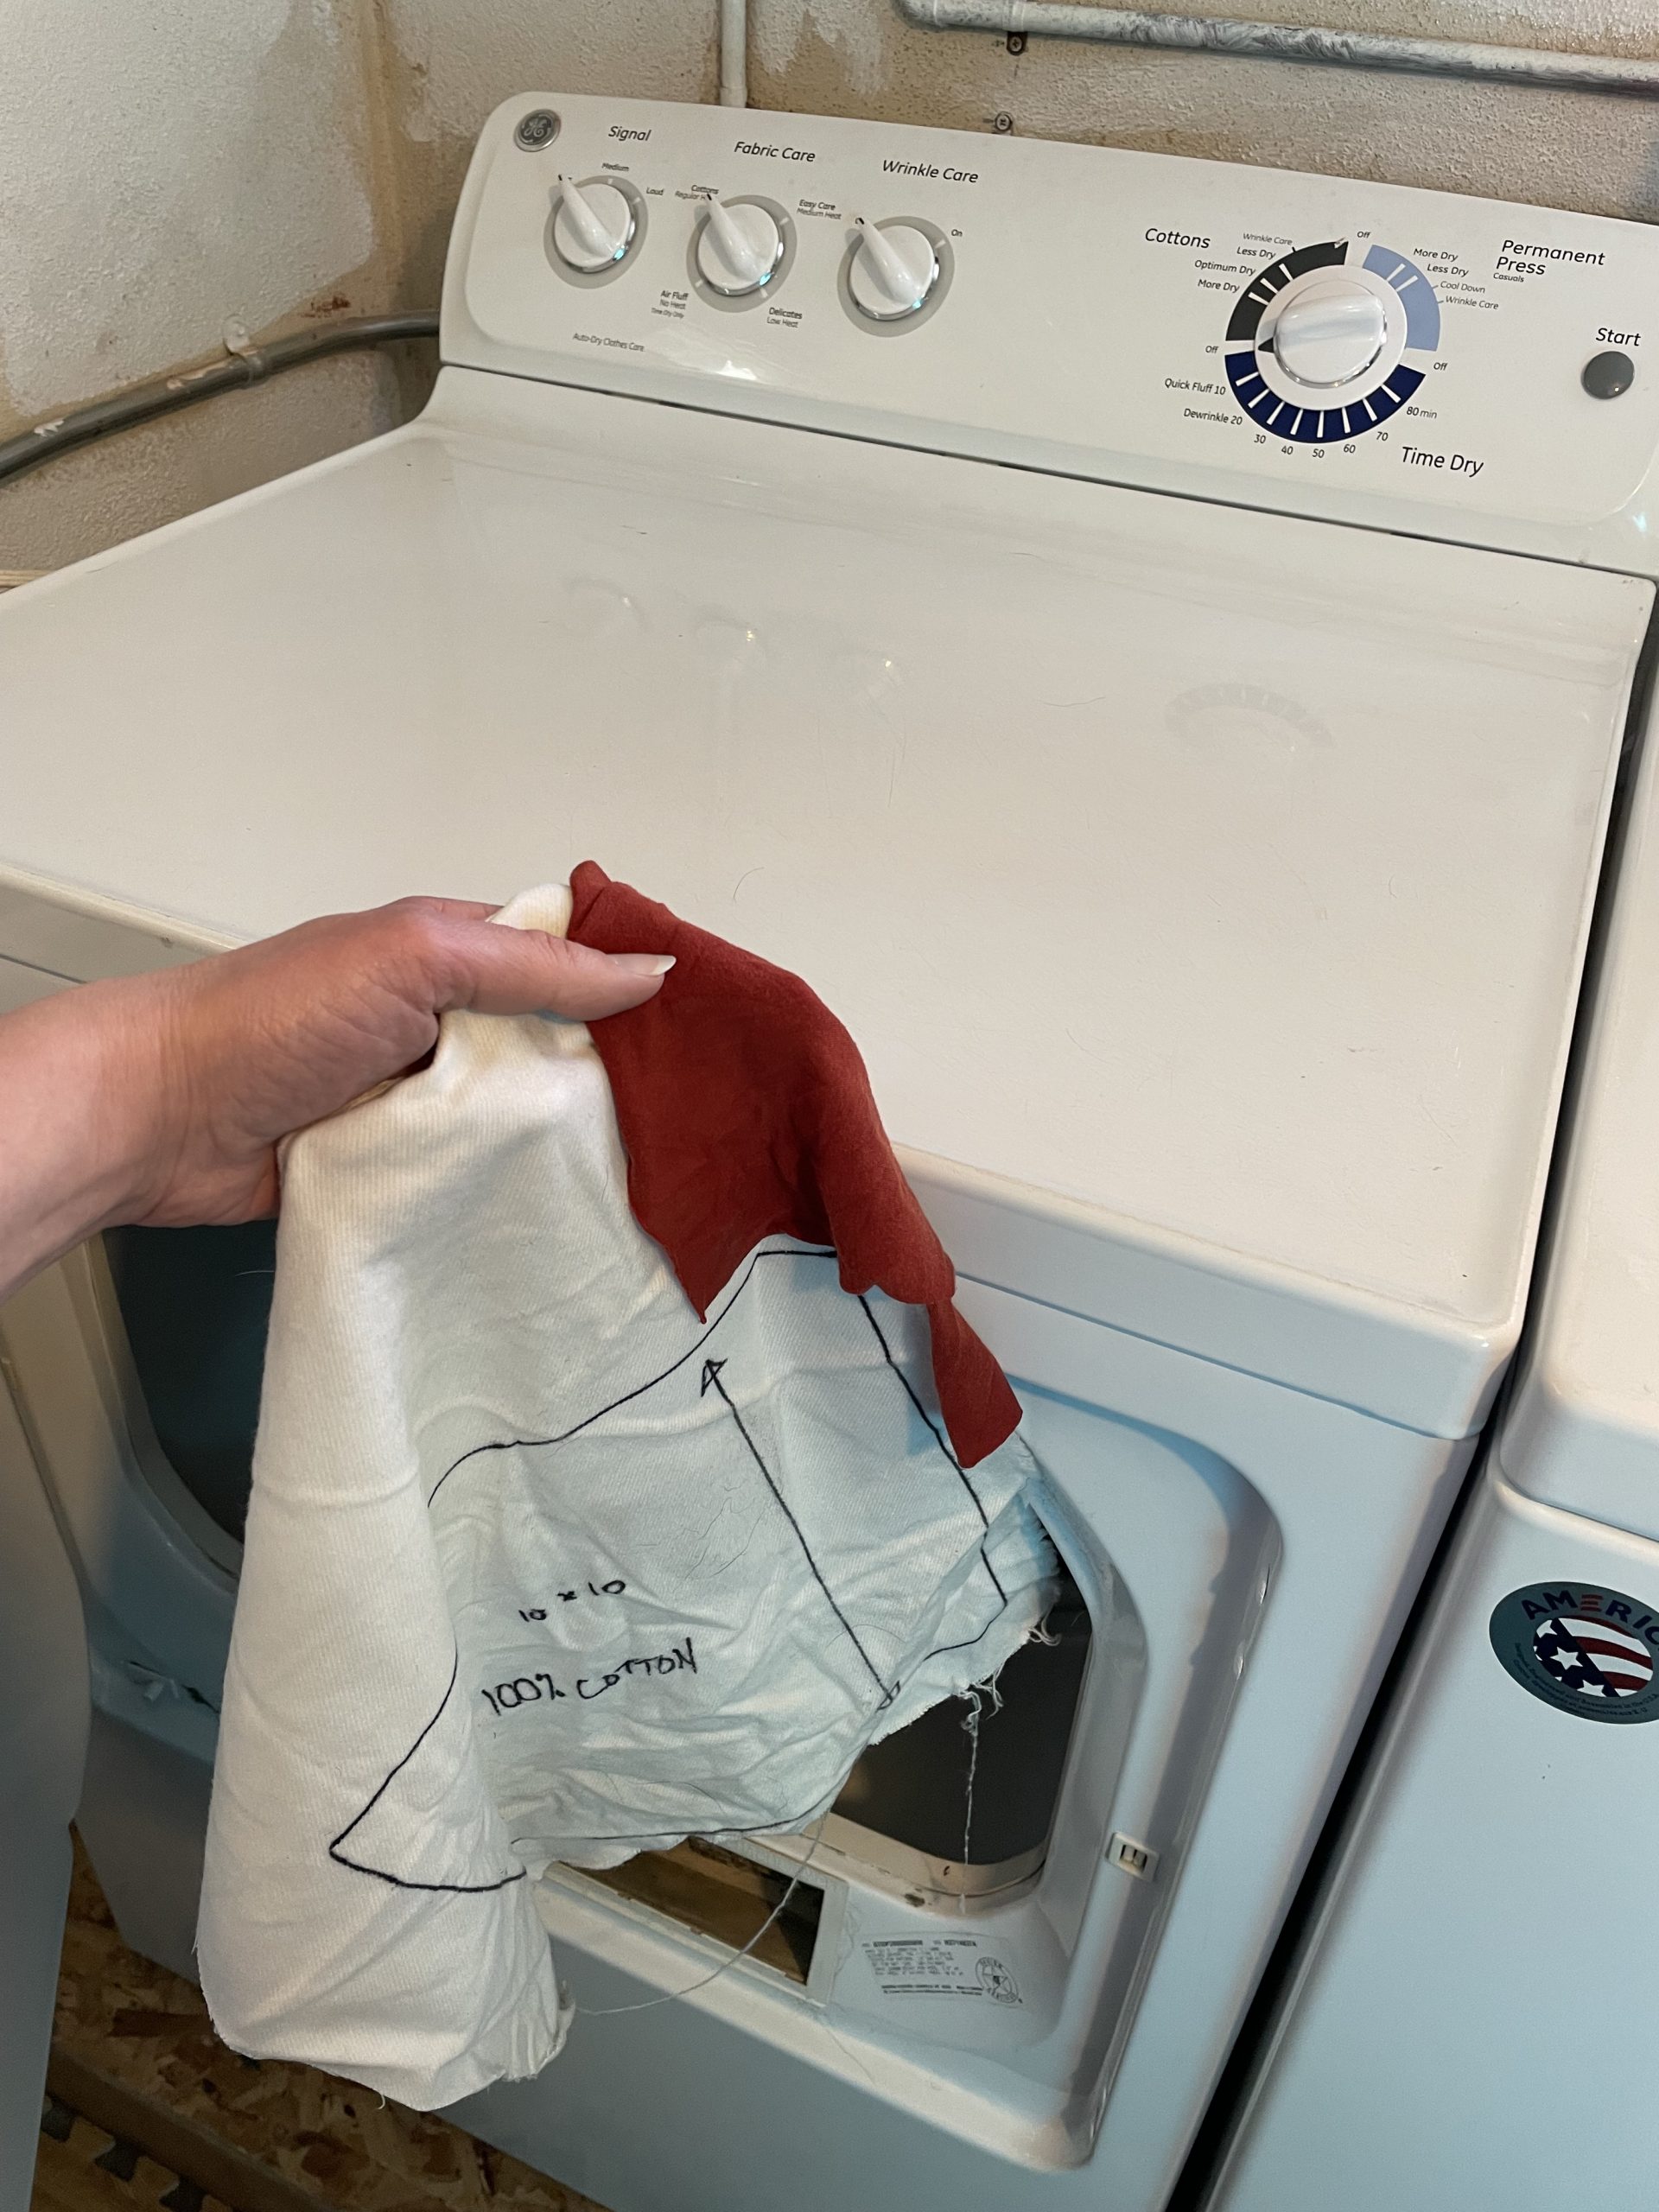
In the case of the woven cotton sample, 10-9.5 = .5 shrinkage, .5/10 = .05, multiplied by 100 to get 5% shrinkage. The rust colored knit calculations would be .75/11 = .068 or 6.8% vertical shrinkage. The width of the knit looked like it also might have shrunk at first glance, but the fabric edges had just curled in the wash.

Once you’ve calculated shrinkage for a fabric, your patternmaker can add this percentage to the length and/or width of the patterns before cutting, and the final product will end up fitting as intended after washing and shrinking. Keep in mind that it is best practice to work with unwashed fabric during initial patternmaking and sample sewing, and then add on the shrinkage once the pattern has been finalized. Finished sample measurements and feedback for pattern adjustments should also be noted before the sample is worn or washed, which can affect both stretching of things like necklines and shrinkage of sleeve lengths.
If you happen to have multiple materials with varying shrinkage amounts that are used for the same style, you may end up using different versions of the pattern on separate cuts; however, keep in mind that doing so may incur additional labor costs on the production side. It’s not as common, but some brands end up garment washing after sewing to minimize shrinkage on the consumer side. Regardless of how you choose to handle shrinkage, it’s a detail that should be factored into the initial process of fabric sourcing and testing.
1 Comment
This is extremely helpful, Jessica, thank you! Especially the photos of the how to mark the material for the shrink test!